
Victorian Arrow Weathervane on a Dovecote Man Cave
This article covers the installation of a polished copper Victorian arrow weathervane on the apex of an elaborate brick garden outbuilding. The structure is a dovecote style turret, built from red brick with a pyramid shaped tiled roof. A builder fitted the weathervane himself, dropping the stem down through the roof structure and securing it to an internal post bracket out of sight. We explain why this installation method works so well on a turret or cupola, what the Victorian arrow design brings to a building of this character, and what to consider if you are planning something similar for a garden outbuilding of your own.
The Building: A Dovecote Man Cave
This is not a typical garden shed. The structure in these photographs is a substantial, purpose built garden outbuilding that features a traditional dovecote or garden turret, constructed from red brick with a multi faceted pyramid tiled roof in terracotta and a birdhouse section at the very top. Buildings like this occupy a fascinating space in garden design. They are outbuildings by function, but they carry the visual language and architectural ambition of something far more considered. The brickwork is laid in a clean stretcher bond, the roof tiles are properly coursed with overlapping terracotta waves, and the upper section with its natural timber frame is clearly the work of someone who thought carefully about the whole composition. Adding a copper weathervane to the apex is the kind of finishing touch that completes a building of this character rather than decorating it as an afterthought. The builder who fitted it understood that instinctively. A structure this well resolved deserved a weathervane with the same traditional sensibility, and the Victorian arrow delivers exactly that.
Why the Victorian Arrow Is the Right Design for a Turret
The Victorian arrow is one of the most architecturally versatile weathervane forms. Arrow designs have topped buildings since the early medieval period, and the Victorian iteration of the form introduces scrolled detailing, copper globe accents, and integrated cardinal points that make it as decorative as it is functional. The result is a design that reads as a genuine architectural detail rather than an added ornament. On a turret or cupola specifically, the arrow form works better than most figurative designs for a straightforward reason: scale and silhouette. A turret apex is a small, precise point. A figurative weathervane, a cockerel, a horse, or a galleon, demands a certain scale to read properly and sits best on a broad ridge or a wide gable. The Victorian arrow, by contrast, is a vertical composition that rises from the apex with elegance and reads clearly against the sky at any size. The scrollwork detailing in the medium copper Victorian arrow weathervane we supply is scaled precisely for this kind of position, and the integrated NSEW cardinal points add genuine functionality without bulk. There is also a historical logic to the choice. Dovecotes and garden turrets in British tradition almost always carried arrow or banner weathervanes rather than figurative designs. Fitting a Victorian arrow to a building of this style is not just a matter of aesthetics but of architectural continuity.
The Internal Post Bracket Installation Method
The installation method used here is one of the most elegant available for a turret or cupola, and it is particularly well suited to a building where the builder or owner wants a completely clean external finish with no visible bracket hardware. The weathervane stem was dropped down through the apex of the roof from above, passing into the interior of the structure. Inside, the stem was secured to a post bracket for medium copper weathervanes, which was fixed to a timber post or internal structural member within the turret. The bracket, the fixing, and all of the securing hardware are entirely concealed inside the building. From the outside, the weathervane appears to rise directly from the roof with no visible means of support.
This method requires a little more planning than a standard external gable bracket installation, but the result is visually superior on any structure with a conical or pyramidal roof. The key requirements are a clear vertical path from the apex down to a fixing point inside, sufficient headroom or access to fit the bracket, and a stem length appropriate to the depth of the roof at the apex. On a building with an upper section like this one, access is relatively straightforward. The builder was able to work from inside the enclosure to position and secure the bracket without difficulty.
If your outbuilding has a solid roof with no internal access, a different bracket solution will be needed. We supply adjustable roof brackets, gable brackets, and garden pole fittings to cover a wide range of situations, and we are happy to advise on the right choice for any specific roof form.
Polished Copper on a Garden Outbuilding
The choice of polished copper for this installation is a strong one and it works particularly well against the warm red brick and terracotta tile palette of the building. Polished copper has a warm, golden tone that sits in the same colour family as well fired clay, and the two materials together create a visual harmony that aged steel or painted ironwork simply cannot match. Copper is also the most architecturally appropriate material for a building of this ambition. That kind of material continuity is exactly what separates a considered installation from a weathervane simply placed on a roof. Over time, the polished copper will develop a natural patina, moving from the bright initial warmth through amber and brown tones before eventually developing the green verdigris character that copper buildings and details are famous for. This will happen gradually and will be accelerated slightly by rain and atmosphere. If you prefer the aged appearance from the outset, we also supply a verdigris version of the Victorian arrow that has been professionally aged before leaving the workshop. Both are pure copper and equally durable.
Customer Installation Photos
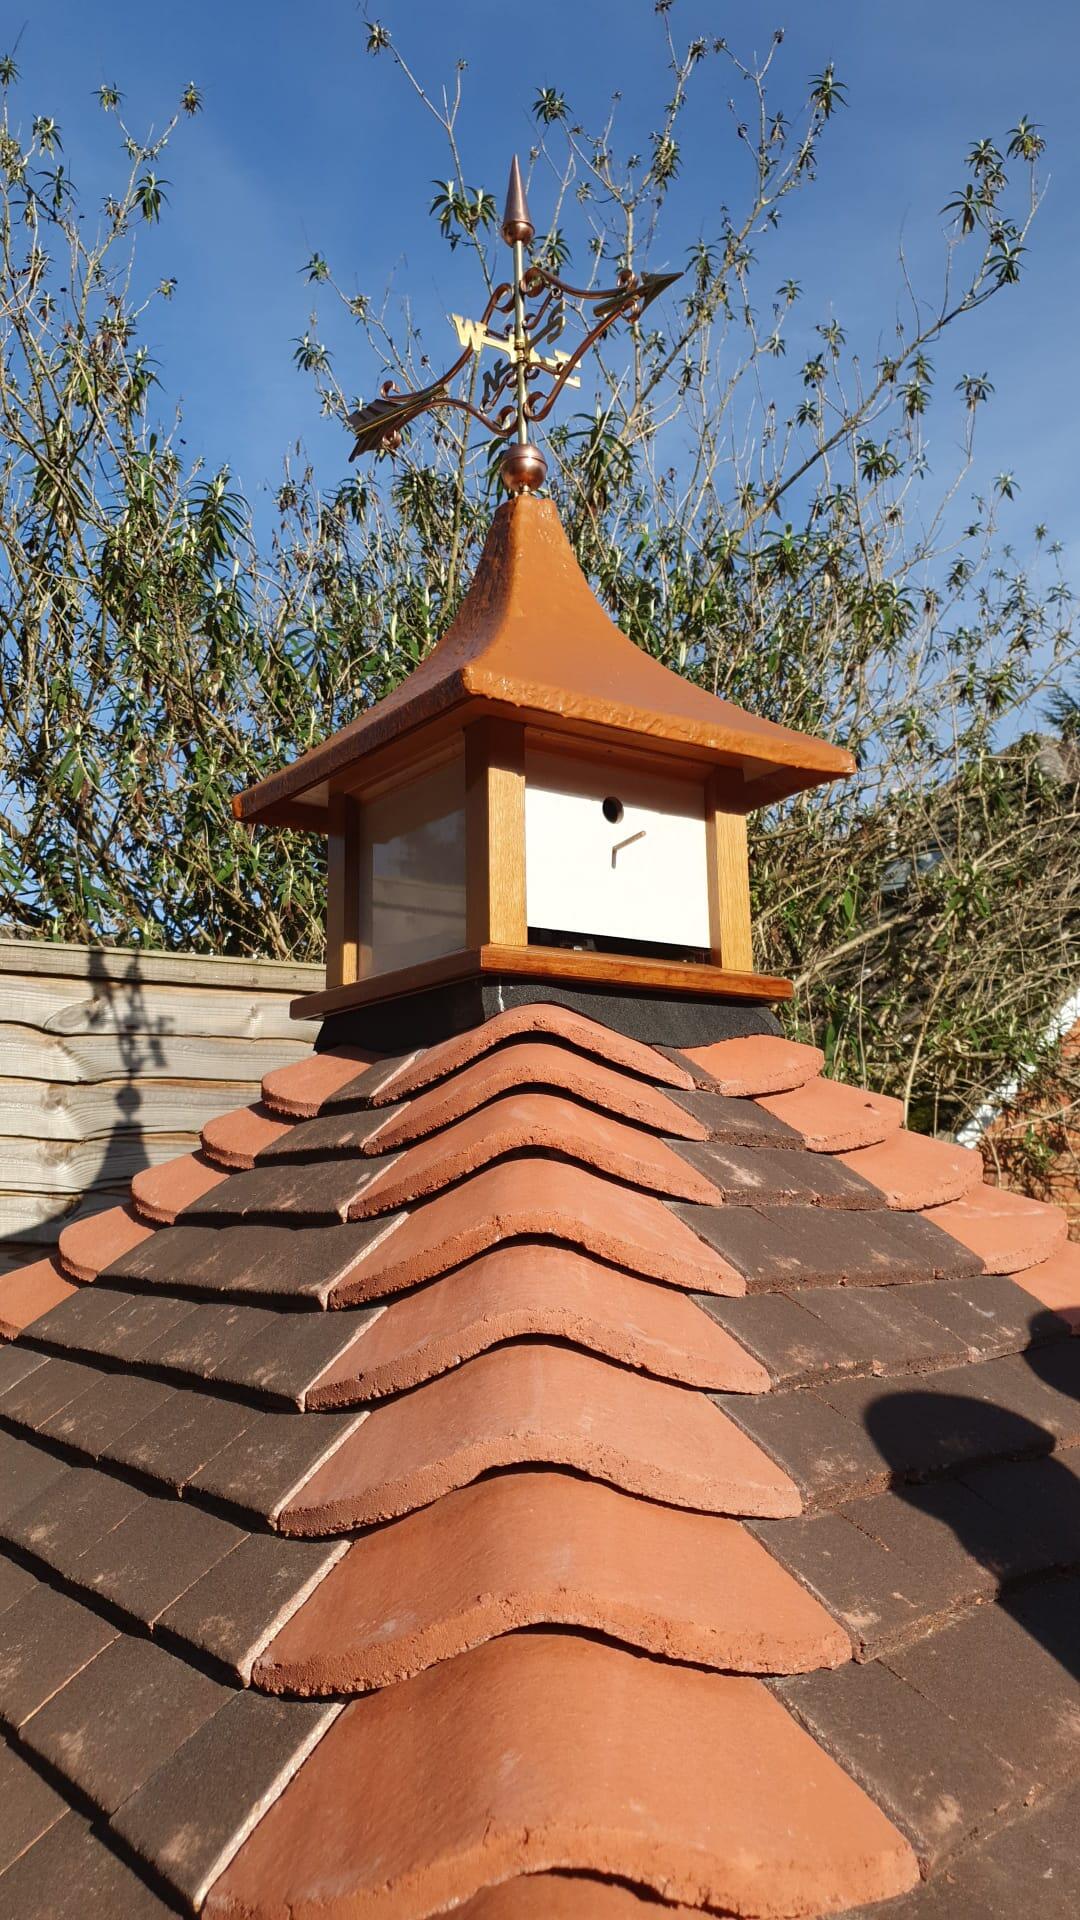

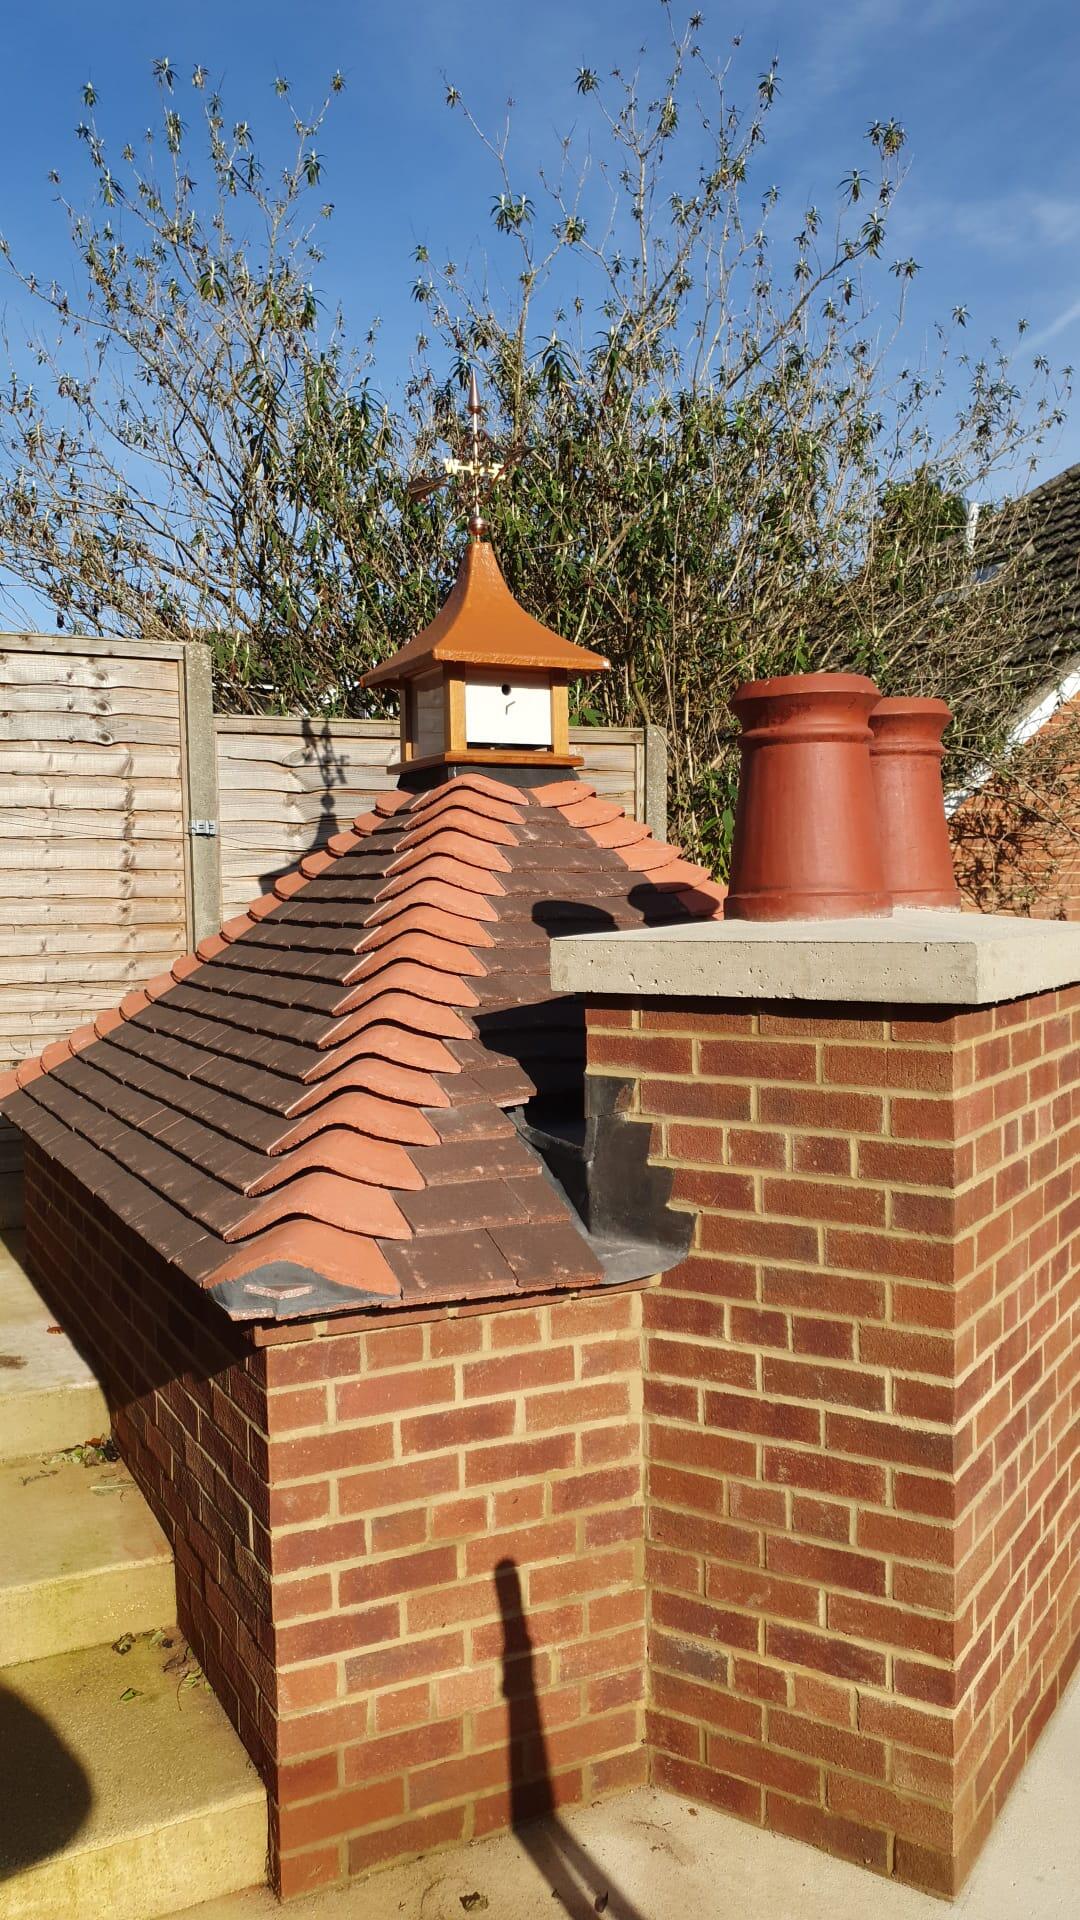
The three photographs show the installation from three different viewpoints: a close up of the weathervane itself at the apex, a mid distance view showing the relationship between the turret and the main building chimney, and a full elevation shot that puts the whole structure in context. The internal post bracket method means there is no external hardware visible anywhere on the outside of the building. The weathervane appears to emerge naturally from the copper cap, which is exactly the effect a carefully planned installation should achieve.
Weathervanes and Garden Outbuildings
Garden outbuildings are one of the most rewarding settings for a weathervane, and one that is often overlooked in favour of the main house. A summer house, workshop, studio, garden office, or an elaborate man cave like this one all offer exactly the kind of roof form and visual prominence that makes a weathervane work hard as a feature. Outbuildings are also often the one place on a property where the owner has complete creative freedom. The main house may be listed, may sit within a conservation area, or may simply have a roof form that is not well suited to a weathervane. The garden building carries none of those constraints, and it is frequently the more interesting structure to work with.
For garden buildings with a conical or pyramidal roof, the internal post bracket method used in this installation is almost always the best approach. For buildings with a pitched roof and a clear gable end, the standard 5 inch gable bracket that comes included with every medium copper weathervane is the simplest and most straightforward solution. We supply the full polished copper weathervane range and the traditional weathervane collection across a variety of designs, and there is something appropriate for almost every garden building type.
Your Step by Step Buying Guide
Step one: assess your roof form. The installation method depends entirely on the roof. A conical or pyramidal apex with internal access suits the post bracket drop through method. A pitched roof with a gable end suits the standard 5 inch gable bracket. If you are unsure, get in touch and describe the building and we will advise on the right approach.
Step two: choose your design. For a turret, cupola, or dovecote, the Victorian arrow is a strong and architecturally appropriate choice. If the building has a broader roof with more visual space, a figurative design from the copper weathervane collection may suit better.
Step three: choose your finish. Polished copper gives a warm, bright initial appearance that develops a natural patina over time. The verdigris Victorian arrow is professionally aged before despatch for those who prefer the antique character from day one. Both are pure copper and equally long lasting.
Step four: confirm your bracket. The medium copper post bracket is the correct fitting for an internal drop through installation on a conical or pyramidal roof. Additional bracket options are available in the brackets and fittings section if your situation differs.
Step five: order and installation. We supply weathervanes to customers across the UK mainland including England and Wales. The weathervane, stem, and cardinal points compass ring all arrive ready to assemble. For a post bracket installation, the main task is securing the bracket to a fixed internal timber at the correct height, then dropping the stem through the apex from above and locating the figure on top.
Products Featured in This Article
- Medium Copper Victorian Arrow Weathervane
- Medium Traditional Pure Copper Verdigris Victorian Arrow Weathervane
- Post Bracket (Medium Copper Weathervanes)
- Large Copper Victorian Arrow Weathervane
- Brackets and Fittings
- Traditional Weathervane Category
- Polished Copper Weathervane Category
Frequently Asked Questions
Can I fit a weathervane on a conical or pyramidal roof without an external bracket?
Yes. The internal post bracket method is ideal for conical and pyramidal roofs. The weathervane stem is dropped down through the apex of the roof from above and secured to a post bracket fixed to an internal timber or structural member inside the building. All of the fixing hardware is concealed inside, leaving a completely clean external appearance. This method requires internal access to the roof apex and a suitable timber to fix the bracket to, but it is well within the capability of a competent builder or confident DIY installer.
What is a post bracket and when should I use one instead of a gable bracket?
A post bracket is a fitting designed to clamp onto or fix to a vertical post or timber, holding the weathervane stem in position from below rather than projecting it outward from a wall or roof face. It is the correct choice when the weathervane needs to be secured internally, typically on a conical or pyramidal roof where there is no external gable face to fix to, or where the owner wants all hardware hidden inside the structure. The standard 5 inch gable bracket that comes with every medium copper weathervane suits pitched roof gable end installations. The post bracket is available separately for situations like turrets, cupolas, and garden buildings with internal access.
Is a Victorian arrow weathervane suitable for a garden outbuilding or man cave?
It is one of the most appropriate designs available for a well built garden outbuilding, especially one with a turret, cupola, or any roof form with traditional architectural character. The Victorian arrow is a historically rooted design that was widely used on dovecotes, estate buildings, and garden structures throughout the nineteenth century. Its vertical composition suits a conical or pyramidal apex, and the integrated cardinal points and scrolled copper detailing add genuine architectural presence without requiring the scale that a figurative weathervane design needs to read well.
Will a polished copper weathervane complement a brick and terracotta tile building?
Yes, very well. Polished copper has a warm golden tone that sits naturally alongside the warm reds and oranges of brick and terracotta roof tile. If the building already has any copper detailing, such as flashing, a conical cap, or guttering, the weathervane will read as a continuation of the same material. Over time, all of the copper elements will develop a matching patina, which gives the building a genuinely coherent aged character that improves with every passing year.
Do I need planning permission to add a weathervane to a garden outbuilding?
In most cases, no. Adding a weathervane to a garden outbuilding falls within permitted development rights for most residential properties in England and Wales. However, if the property is listed, sits within a conservation area, or if the outbuilding itself required planning permission as a condition of its construction, it is always worth checking with your local planning authority before proceeding. We supply weathervanes across the UK mainland and are happy to discuss any questions about installation or suitability, but planning advice should always come from a qualified professional or your local authority.
Explore Our Victorian Arrow and Copper Weathervane Range
If this installation has given you ideas for your own garden building, you can browse the full medium copper Victorian arrow weathervane page or explore the wider traditional weathervane collection online. If you have a question about a specific roof form, the right bracket for an internal installation, or which design would suit your outbuilding best, get in touch and we will be glad to help.
Featured Products


Boxing hares weathervane


Large copper arrow weathervane


Large copper banner weathervane


Large copper biplane weathervane


Large copper verdigris dolphin weathervane


Large copper verdigris stag weathervane


Large copper verdigris victorian arrow weathervane

